Managing Light Pollution and Color Balance in Night Scapes
What You'll Learn About Controlling Artificial Light
This post covers how to identify, mitigate, and balance the impact of light pollution and artificial light sources when shooting night photography. You'll learn why your white balance often fails under streetlights and how to keep your shadows from looking muddy or a strange shade of orange.
The biggest headache in night photography isn't the lack of light—it's the wrong kind of light. Whether you're dealing with the orange glow of sodium vapor lamps or the harsh blue of modern LEDs, these sources can ruin a perfectly composed shot if you don't have a plan. Most beginners think they can just fix it in post, but if the color data isn't there in the RAW file, you're stuck with a mess. You need to understand how your sensor reacts to these wavelengths before you even press the shutter.
How Do I Fix Orange Light in Night Photos?
That stubborn orange cast from old streetlights is a classic problem. If you're shooting in a suburban area or near a highway, your camera's auto white balance (AWB) will likely struggle. AWB tries to make the scene look "neutral," but under high-pressure sodium lamps, it often produces a result that looks like a sunset went wrong. To fix this, you need to stop relying on the camera's brain and start using your own.
When shooting, I recommend setting a custom white balance or using a Kelvin setting. If you see a lot of orange, move your Kelvin value down (around 3000K to 4000K) to add blue and neutralize that warmth. This isn't just about making the photo look "natural"; it's about ensuring you have enough color information in the blue channels to actually work with later. If you push the temperature too far into the red, you'll end up with chromatic aberration or strange color banding in the sky. For a deeper look at how light temperature works, check out the technical breakdowns at Photography Life.
The Impact of Light Color on Dynamic Range
It's not just the color that's the problem—it's the intensity. Artificial lights are often much brighter than the stars or the moon. This creates a massive gap in dynamic range. If you expose for the stars, your city lights will blow out into white blobs. If you expose for the lights, the sky becomes a black void. This is where your histogram becomes your best friend. You want to keep your highlights from hitting the far right side of the graph, but you don't want to underexpose your shadows so much that they become pure noise.
One trick I use is to bracket my shots. I'll take one exposure for the star-filled sky and another for the illuminated foreground. In post-processing, I can blend these two together. This isn't a "cheat"—it's a standard way to handle high-contrast environments. If you're interested in the math behind light, Britannica has some great foundational articles on the physics of light and spectrums.
Why Does My Night Sky Look Green or Purple?
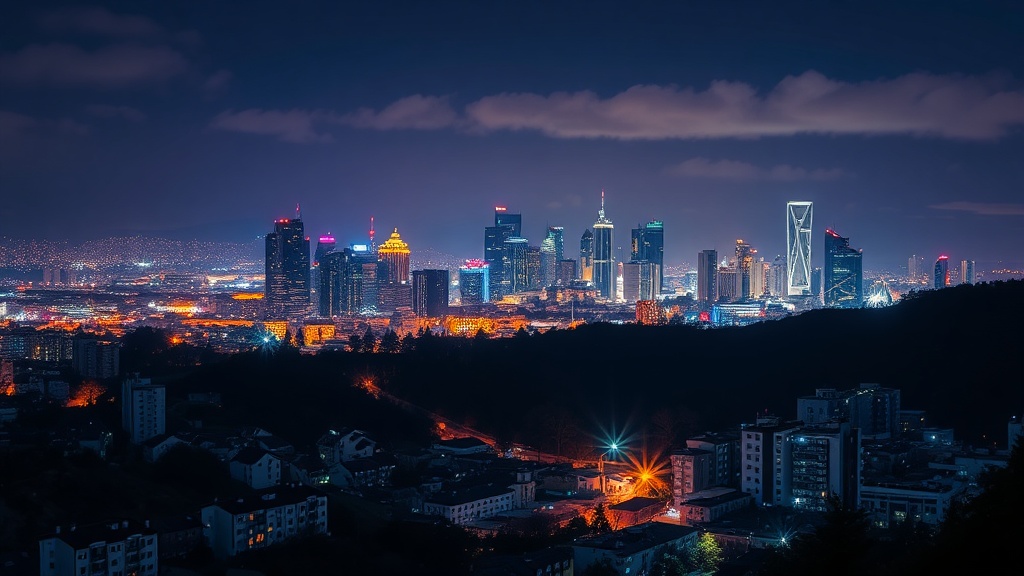
If your sky looks unnaturally green or a weird shade of purple, you're likely dealing with a combination of light pollution and sensor limitations. Light pollution from nearby cities often creates a "sky glow" that can shift the color of the atmosphere. This isn't just a visual nuisance; it's a mathematical reality of how light scatters through the air. When you see that glow, it's often a sign that you're shooting in an area with high aerosol content or humidity, which scatters light more aggressively.
To fight this, look for locations with lower light pollution levels. You can use tools like the Light Pollution Map to find darker spots. Even if you can't find a dark site, you can adjust your white balance to compensate. If the sky looks too green, shift your tint toward the magenta side. This is a subtle move—don't overdo it, or your shadows will look artificial and plastic. It's a balancing act between the natural look of the night and the reality of the light being cast on your lens.
Using Filters to Control Light
A lot of people think filters are only for daytime. That's a mistake. Using a light pollution filter (often called a CLS or Natural Night filter) can help subtract specific wavelengths of light—specifically the orange from sodium lamps. These filters are particularly useful if you are doing long-exposure shots of landscapes where city lights are in the background. However, be warned: these filters can also affect your white balance significantly, making the process of color correction a bit more tedious.
Another thing to consider is the use of a graduated ND filter. While usually used for daylight, a slightly dark ND can help if you're shooting a scene with a very bright artificial light source in the foreground, helping to bring the light levels closer to the level of the night sky. This helps prevent that "blown out" look in the highlights. It's a way to bring some balance to a scene that's inherently unbalanced.
Can I Fix Color Casts in Post-Processing?
Yes, you can, but there is a limit. If you're shooting in JPEG, you've already lost the battle. JPEG files are heavily processed by the camera's software, meaning the color data is baked in and compressed. If you try to pull a green-tinted sky back to a natural deep blue in a JPEG, you'll see digital artifacts and "noise" immediately. This is why I always insist on shooting in RAW. A RAW file contains the uncompressed data from the sensor, giving you much more room to wiggle the white balance and tint sliders.
When working in your editing software, don't just use the global white balance slider. Try using local adjustments. If the streetlights are orange but the sky is blue, use a brush or a radial filter to adjust the temperature of the lights separately from the sky. This allows you to keep the depth of the night while still neutralizing the artificial warmth of the foreground. It's a more surgical approach that yields much better results than a blanket correction.
| Light Source | Typical Color Cast | Correction Direction |
|---|---|---|
| Sodium Vapor | Orange/Yellow | Increase Blue/Cyan |
| LED Streetlights | Cool Blue/White | Increase Warmth/Magenta |
| Moonlight | Cool Blue | Increase Warmness |
Ultimately, successful night photography is about understanding the light you're actually working with, rather than the light you wish was there. Whether it's the glow of a distant city or the harsh glare of a nearby porch light, knowing how to identify and counter these colors is what separates a snapshot from a professional-looking image. Keep experimenting with your Kelvin settings and don't be afraid to push the limits of your sensor's data. The more you practice, the more intuitive these adjustments will become.